
Created on October 28th, 2026 at 05:30 am
Table of Contents
Introduction: Japanese Yogurt Cheesecake
The Origin of Japanese Yogurt Cheesecake
Japanese Yogurt Cheesecake, often known for its fluffy and light texture, is a delightful twist on traditional cheesecakes. This dessert became popular in Japan in the 1980s and has since captivated dessert lovers around the world. Combining the creamy richness of cheesecake with the airy lightness of a soufflé, it offers a unique taste experience that is both sweet and tangy thanks to the yogurt component.
The delicate balance of flavors and textures makes it a sought-after treat for those who enjoy lighter desserts that do not compromise on taste. Its origin reflects Japan’s innovative approach to traditional dishes, blending Western and Eastern culinary influences to create something entirely new and delicious.
Why You’ll Love This Recipe
This Japanese Yogurt Cheesecake recipe is perfect for those who adore creamy and fluffy desserts. The use of yogurt not only adds a tangy flavor but also contributes to its soft texture, making it an ideal choice for easy Japanese desserts. It’s a light cheesecake that feels indulgent without being overly heavy, making it perfect for any occasion, from casual gatherings to special celebrations. Additionally, this recipe is straightforward, allowing even novice bakers to achieve a beautiful and delicious result.

Love baking cakes like this one? 🎂
Get our newest cake recipes and seasonal baking ideas in your inbox every week. Free, no spam, unsubscribe anytime. See our Privacy Policy.
Ingredients
Essential Ingredients for Success
To make this Japanese Yogurt Cheesecake, you’ll need a selection of both wet and dry ingredients that work together to create its signature texture and flavor. Key ingredients include cream cheese, yogurt, eggs, flour, and sugar. Each plays a crucial role in achieving the desired lightness and creaminess.
The cream cheese forms the base, providing that classic cheesecake richness. The yogurt introduces a slight tang and helps with the airy texture. Eggs are vital for structure, while flour and sugar balance the flavors and contribute to the cake’s stability.
Substitutions and Variations
While the classic recipe is delicious, there are plenty of substitutions and variations you can try to put your own spin on this dessert. For a gluten-free version, substitute the all-purpose flour with an equal amount of almond flour. You can also experiment with different yogurt flavors to add a twist, such as vanilla or honey yogurt.
If you’re looking to reduce the sugar content, consider using a sugar substitute that bakes well, keeping in mind it might slightly alter the texture. For a richer flavor, you can add a touch of vanilla extract or lemon zest.
Step-by-Step Instructions
Preparing the Batter
Start by ensuring all your ingredients are at room temperature, which helps them blend more smoothly and evenly. In a large mixing bowl, beat the softened cream cheese until it’s smooth and free of lumps. Gradually add the sugar, continuing to beat until the mixture is light and fluffy.
Next, incorporate the yogurt and mix until combined. Add the eggs one at a time, mixing well after each addition. Finally, sift in the flour and baking powder, folding them into the batter gently to maintain the airiness.
Baking to Perfection
Preheat your oven to 325°F. Prepare a 9-inch round cake pan by greasing it and lining the bottom with parchment paper. Pour the batter into the prepared pan, smoothing the top with a spatula. Bake in the preheated oven for about 50 minutes, or until the top is lightly golden and a toothpick inserted into the center comes out clean.
To ensure even baking, you can use a water bath by placing the cake pan in a larger pan filled with a small amount of water. This helps prevent the cake from cracking and ensures a moist, tender crumb.
Cooling and Serving
Once the cheesecake is done, turn off the oven and leave the door slightly ajar, allowing the cake to cool gradually inside for about 1 hour. This slow cooling process helps prevent the cake from collapsing or cracking.
After it has cooled in the oven, remove it and transfer to a wire rack to cool completely. Once cooled, refrigerate for at least 2 hours before serving. This cheesecake is best served chilled, allowing the flavors to meld and the texture to set.
Pro Tips
To create the perfect Japanese Yogurt Cheesecake, keep these tips in mind:
- Ensure all ingredients are at room temperature for a smooth batter.
- Use a water bath to prevent cracking and ensure even baking.
- Don’t over-mix the batter, especially after adding the flour, to maintain its light texture.
- Allow the cake to cool gradually in the oven to prevent collapsing.
The most crucial tip is to use a water bath during baking. It helps maintain the cake’s moisture and creates a beautiful, crack-free top.
Love baking cakes like this one? 🎂
Get our newest cake recipes and seasonal baking ideas in your inbox every week. Free, no spam, unsubscribe anytime. See our Privacy Policy.
Serving Suggestions
Pairing with Beverages
This light cheesecake pairs beautifully with a variety of beverages. For a traditional touch, enjoy it with a cup of green tea, which complements its delicate flavors. Alternatively, a light white wine such as a Riesling or a sparkling water with a splash of lemon can add a refreshing contrast.
Decorative Toppings
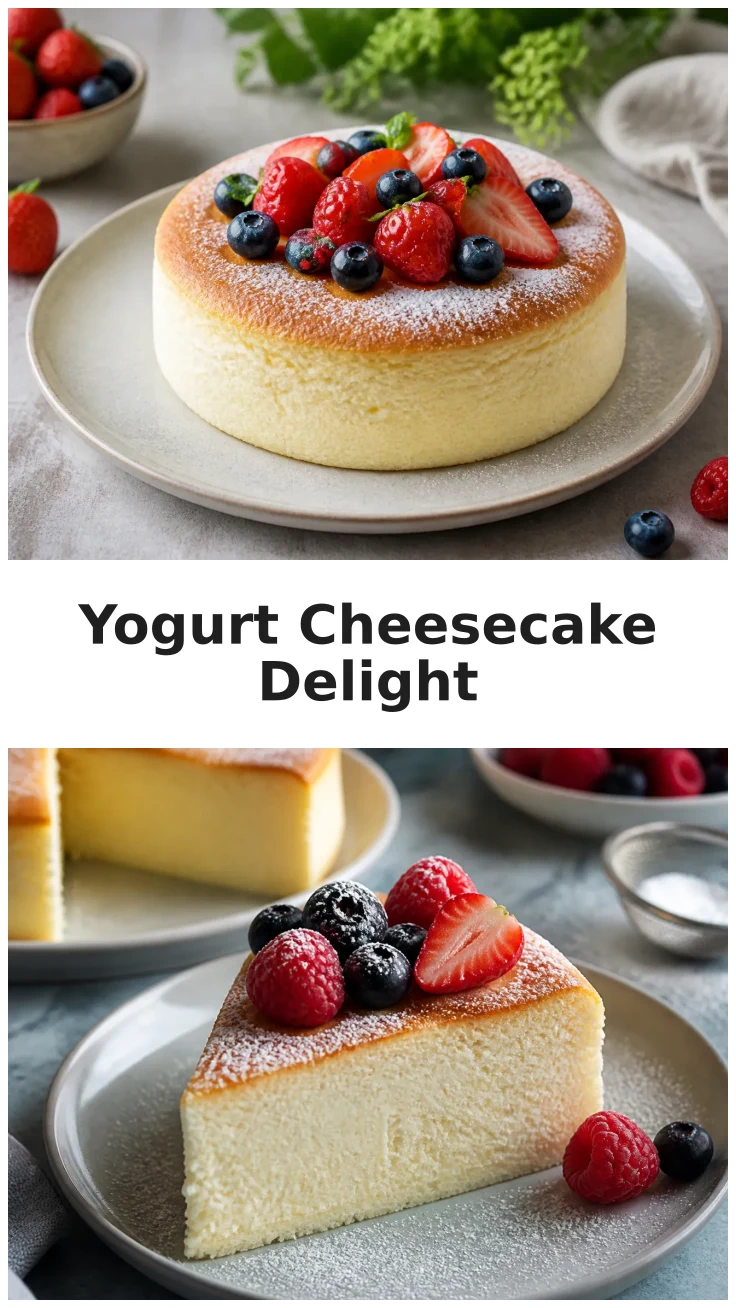
Enhance your cheesecake’s visual appeal with some decorative toppings. Fresh berries like strawberries or blueberries add color and a burst of flavor. A dusting of powdered sugar can also give it an elegant finish.
Nutritional Information
Calories and Macros
This Japanese Yogurt Cheesecake is a relatively lighter option compared to traditional cheesecakes. Each slice contains approximately 320 calories, making it a delightful treat without the guilt. It provides a balanced profile of macronutrients, including carbohydrates, proteins, and fats.
Health Benefits of Yogurt
Yogurt is not only a delicious addition to this cheesecake but also offers health benefits. It is a probiotic-rich food that can aid digestion and support gut health. Additionally, yogurt is a good source of calcium and protein, contributing to bone health and muscle maintenance.


Japanese Yogurt Cheesecake

Equipment
- 1 9-inch round cake pan greased and floured
- 1 electric mixer
- 1 Mixing Bowl large
Ingredients
Dry Ingredients
- 2/3 cup all-purpose flour
- 2 tbsp cornstarch
- 1 tsp baking powder
Wet Ingredients
- 1/2 cup unsalted butter softened
- 8 oz cream cheese room temperature
- 3/4 cup plain yogurt
- 3/4 cup granulated sugar
- 4 large eggs separated
Instructions
Preparation
- Ensure all ingredients are at room temperature to start. Preheat the oven to 325°F.
- In a large mixing bowl, beat the cream cheese and butter until smooth and creamy. Gradually add sugar, beating until light and fluffy.
- Add yogurt and mix until well combined. Incorporate egg yolks one at a time, mixing thoroughly after each addition.
- In a separate bowl, sift together flour, cornstarch, and baking powder. Gradually fold into the wet mixture.
- In another bowl, beat egg whites until stiff peaks form. Gently fold the egg whites into the batter in batches.
- Pour the batter into the prepared cake pan. Smooth the top with a spatula.
- Bake in the preheated oven for 50 minutes, or until the top is golden and a toothpick comes out clean.
- Turn off the oven, leave the door slightly open, and let the cake cool inside for 1 hour.
Serving
- Remove the cake from the oven, cool completely on a wire rack, then refrigerate for at least 2 hours before serving.
Storage
- Store any leftovers in an airtight container in the fridge for up to 3 days.
Notes
Ingredient Substitutions: For a gluten-free version, use almond flour instead of all-purpose flour. Try flavored yogurts for a unique twist.
How to Serve: Serve chilled with fresh berries and a dusting of powdered sugar for an elegant presentation.
Storage & Freshness: Keep refrigerated in an airtight container for up to 3 days. Best enjoyed fresh.
Make-Ahead Tips: Prepare the cheesecake a day ahead and store in the fridge overnight for the best texture and flavor.
FAQ
Can I make this cheesecake without a water bath?
While it’s possible to make this cheesecake without a water bath, using one helps to achieve the best texture and prevents the top from cracking. The water bath ensures even heat distribution and maintains moisture, resulting in a smooth and creamy cheesecake. If you choose to skip it, be sure to monitor the baking closely to avoid overcooking.
What type of yogurt is best for this recipe?
Plain whole milk yogurt is recommended for this recipe as it provides the right balance of creaminess and tanginess. Greek yogurt can also be used, but it may result in a slightly thicker texture due to its higher protein content. Avoid using flavored yogurts unless you want to introduce additional flavors into the cheesecake.
Enjoyed this recipe? Leave a review!
There are no reviews yet. Be the first one to write one.

