
Created on June 16th, 2026 at 11:08 am
Table of Contents
Introduction to Stack Cake
Stack cake is a traditional Appalachian dessert that stands out for its unique composition and rich history. Unlike your typical layered cake, a stack cake consists of multiple thin layers, often made from a simple gingerbread or molasses-flavored batter. These layers are traditionally stacked with a sweet filling, such as apple or peach preserves, between each layer. The beauty of a stack cake lies not only in its taste but also in the cultural significance and community spirit it embodies. For more inspiration, check out Pickle Cake.
The origins of stack cake are rooted deeply in Appalachian culture. Historically, it was a communal effort at weddings, where guests would each bring a layer of the cake to contribute to the final creation. This practice symbolized the community’s support and unity in celebrating a new marriage. Over time, the stack cake has evolved, but it remains a beloved dessert in the region, revered for its connection to tradition and family.
What is a Stack Cake?
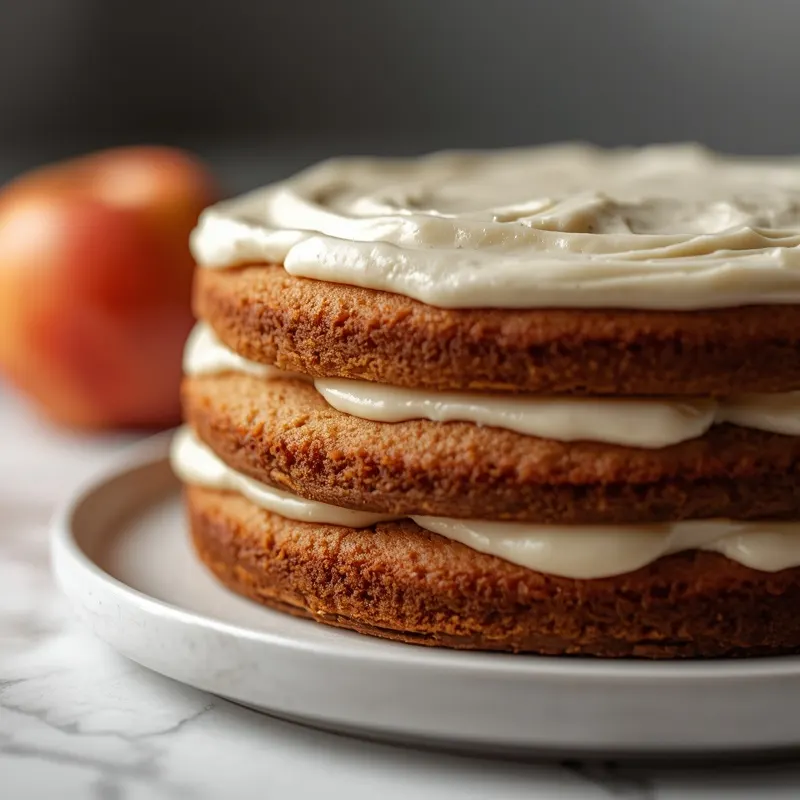
A stack cake is often composed of six to twelve thin layers, making it a visually impressive dessert. Each layer is typically about as thick as a pancake, and they’re assembled with a layer of sweet filling between them. This dessert’s flavor improves over time, as the layers absorb moisture from the filling, resulting in a tender and flavorful cake. It is commonly made with dried apple filling, but variations exist, incorporating other fruits or even different cake flavors.
The History of Stack Cake
The stack cake’s history is as rich as its flavor. Originating from the Appalachian region, this cake was a staple at community gatherings and celebrations. It is said that the tradition began in the late 1800s and was particularly popular at weddings, where each guest would contribute one layer of the cake. This not only created a tall and impressive dessert but also symbolized the community’s support for the couple. The tradition of the stack cake highlights the importance of community and collaboration in Appalachian culture.
Cultural Significance
Beyond its delicious taste, the stack cake carries cultural significance, representing the Appalachian community’s values of sharing and togetherness. The cake’s construction from individual contributions mirrors the way people in the region historically relied on one another. It’s a dessert that tells a story of unity and shared joy, making it more than just a treat but a symbol of cultural heritage.
Ingredients for Stack Cake
The key to a perfect stack cake lies in its ingredients, which are simple yet flavorful. The basic ingredients include all-purpose flour, baking powder, salt, and spices for the dry mix. For the wet ingredients, you’ll need butter, sugar, eggs, and milk. These components come together to create a tender, flavorful cake layer.
Basic Ingredients
The foundational elements of a stack cake are straightforward. You’ll need 2 cups of all-purpose flour, 1 teaspoon of baking powder, a pinch of salt, and a teaspoon of spices such as cinnamon or ginger for added warmth. These dry ingredients are combined with a wet mixture of 1/2 cup softened butter, 1 cup granulated sugar, 2 large eggs, and 1 cup of milk. This combination results in a batter that’s easy to work with and produces wonderfully tender cake layers.
Optional Add-ins
To tailor the stack cake to your taste, consider adding some optional ingredients. Chopped nuts, such as pecans or walnuts, can add a delightful crunch to the cake layers. Adding a tablespoon of vanilla or almond extract can also enhance the flavor profile, providing a more complex taste. For a fruity twist, you might incorporate dried fruits like cranberries or raisins into the batter.
Choosing the Right Flours
While all-purpose flour is the go-to choice for a traditional stack cake, experimenting with other varieties can yield interesting results. Cake flour can be used for a lighter, more delicate texture, while whole wheat flour provides a heartier, more rustic cake. If you are looking for gluten-free options, a 1:1 gluten-free baking mix can be substituted without compromising the cake’s structure.
Step-by-Step Stack Cake Recipe
Creating a stack cake from scratch is a rewarding process that requires some patience but is well worth the effort. The steps begin with preparing the cake layers, followed by making the filling, and finally assembling the cake.
Preparing the Cake Layers
To start, preheat your oven to 350°F (175°C) and prepare your cake pans by greasing and flouring them. In a large mixing bowl, cream together the butter and sugar until light and fluffy. Add the eggs one at a time, beating well after each addition. In a separate bowl, combine the flour, baking powder, salt, and spices. Gradually add the dry ingredients to the wet mixture, alternating with the milk, until everything is well incorporated.
Making the Filling
The traditional filling for a stack cake is made with dried apples, which are rehydrated and cooked down to a thick, sweet compote. To make the filling, simmer dried apples with water, sugar, and a pinch of cinnamon until they are soft and spreadable. Alternatively, you can use store-bought apple butter or experiment with other fruit preserves for a different flavor profile. For inspiration, you might consider a Cannoli Cake Recipe for a creamy option.
Assembling the Stack Cake
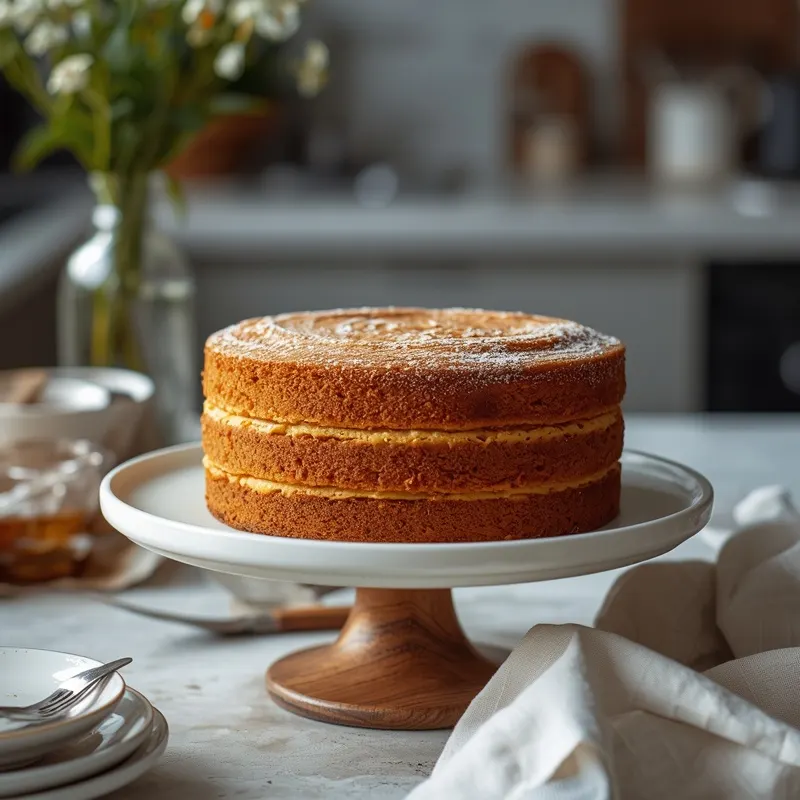
Assembling the stack cake is where the magic happens. Start by placing your first cake layer on a serving platter. Spread a generous amount of the apple filling over the layer, ensuring it reaches the edges. Repeat the process with the remaining layers and filling, pressing down gently to ensure the cake holds together. Once assembled, let the cake rest for several hours or overnight; this allows the flavors to meld and the cake to soften.
Serving and Storing Stack Cake
Once your stack cake is assembled and rested, it’s time to serve and enjoy this layered delight. The cake can be served as is, or you can add a dusting of powdered sugar or a drizzle of caramel sauce for an extra touch of sweetness. For more cake ideas, consider our Lemon Bundt Cake Recipe for a citrusy twist.
Best Ways to Serve
Serving stack cake can be as simple or elaborate as you like. It’s delicious on its own but pairs beautifully with a dollop of whipped cream or a scoop of vanilla ice cream. For a more lavish presentation, garnish with fresh fruit or a sprinkle of toasted nuts. Whether served warm or at room temperature, this cake is sure to impress.
Storage Tips
To store leftover stack cake, cover it tightly with plastic wrap or store it in an airtight container. It keeps well at room temperature for up to three days. For longer storage, refrigerate for up to a week. If you want to freeze the cake, slice it first, then wrap each piece individually in plastic wrap and place in a freezer-safe bag. Thaw slices at room temperature before serving.
Variations and Customizations
The beauty of stack cake lies in its versatility. While the traditional version is made with apple filling, there are countless variations to explore. You can customize the cake’s flavor profile by incorporating different spices, fillings, or even cake bases.
Different Flavor Combinations
Experimenting with flavors can transform your stack cake into a completely new dessert. Consider using a spiced pumpkin or chocolate cake base for a seasonal twist. For the filling, try using fig or apricot preserves, or even a combination of raspberry jam and cream cheese for a rich, tangy contrast. If you’re curious about unique cake flavors, you might find inspiration from our Bluey Cake recipe.
Gluten-Free Stack Cake Options
For those with dietary restrictions, a gluten-free stack cake is entirely achievable. Substitute the all-purpose flour with a gluten-free baking blend, ensuring it includes xanthan gum for structure. Ensure your other ingredients, like baking powder and fillings, are also gluten-free. This adaptation allows everyone to enjoy the deliciousness of a traditional Appalachian stack cake.
Conclusion
In conclusion, the stack cake is more than just a dessert; it’s a slice of history and a testament to the Appalachian community’s spirit. This traditional layered cake recipe offers a delicious way to connect with the past while enjoying a sweet treat. Whether you stick to the classic version or try one of the many stack cake variations, you’re sure to create a memorable dessert that everyone will love.
Recap of the Recipe
To recap, making a stack cake involves preparing simple ingredients, crafting a flavorful filling, and patiently assembling multiple layers. The end result is a beautifully rustic cake that improves with time. Remember to let the cake rest before serving, as this allows the flavors to meld and the cake to achieve its signature tenderness.
Encouragement to Try It Out
If you’ve never made a stack cake before, now is the perfect time to try. With its rich history and delicious taste, this cake is a rewarding project that brings a touch of Appalachian tradition to your table. Whether for a special occasion or just because, a homemade stack cake is sure to delight and impress your family and friends.

Pro Tips
Creating the perfect stack cake requires attention to detail and a few insider tips to ensure success. Whether you’re a seasoned baker or a beginner, these pro tips will help you achieve a delicious and beautifully layered cake.
- Ensure your cake layers are completely cool before assembling; this prevents the filling from melting and causing the layers to slip.
- Use a serrated knife to level each cake layer if needed; this ensures even stacking and stability.
- When spreading the filling, use an offset spatula for a smooth, even layer that reaches all the way to the edges.
- Allow the assembled cake to rest for at least 24 hours before serving; this enhances the flavor and texture.
One of the most critical tips is to let the cake rest overnight. This allows the flavors to meld and the cake to soften, resulting in a more cohesive and delicious dessert. Patience here truly pays off, turning your stack cake into a remarkable centerpiece for any gathering.
Traditional Stack Cake
Equipment
- 1 9-inch round cake pan greased and floured
- 1 electric mixer
- 1 Mixing Bowl large
Ingredients
Dry Ingredients
- 2 cups all-purpose flour
- 1 tsp baking powder
- 1/2 tsp salt
- 1 tsp ground cinnamon
- 1/2 tsp ground ginger
Wet Ingredients
- 1/2 cup unsalted butter softened
- 1 cup granulated sugar
- 2 large eggs room temperature
- 1 cup milk
Filling
- 2 cups dried apples
- 1 cup water
- 1/4 cup granulated sugar
- 1 tsp ground cinnamon
Instructions
Preparation
- Preheat your oven to 350°F (175°C). Grease a 9-inch round cake pan with butter, then dust lightly with flour, tapping out any excess. This ensures the cake releases cleanly after baking.
- Peel, core, and dice the apples into roughly 1/2-inch pieces. Toss them with 1 tablespoon of lemon juice to prevent browning and to add a subtle brightness to the flavor. Set aside.
Making the Batter
- In a large bowl, beat the softened butter and granulated sugar together using an electric mixer on medium speed for 3–4 minutes, until pale and fluffy. Scrape down the sides of the bowl halfway through for even mixing.
- Add the eggs one at a time, beating well after each addition. If the mixture looks slightly curdled, add a tablespoon of your measured flour — this stabilizes the emulsion and keeps the batter smooth.
- Sift the flour, baking powder, salt, and spices together in a separate bowl. Add the dry ingredients to the butter mixture in three additions, alternating with the milk, beginning and ending with flour. Mix on low speed just until combined — do not overmix.
Assembling
- Using a rubber spatula, gently fold the diced apples into the batter until evenly distributed. The batter will be thick — this is normal and helps support the fruit during baking.
- Pour the batter into the prepared cake pan and spread it into an even layer using the spatula. Tap the pan gently on the counter two or three times to release any air pockets.
Baking
- Place the pan on the center rack of the preheated oven. Bake for 45–55 minutes, or until a wooden skewer inserted into the center comes out clean or with just a few moist crumbs attached. If the top browns too quickly, tent loosely with foil after 30 minutes.
Cooling & Serving
- Remove the cake from the oven and let it cool in the pan on a wire rack for 15 minutes. This resting period allows the structure to firm up so the cake releases cleanly without breaking.
- Run a thin knife around the edge of the pan, then invert the cake onto the wire rack. Remove the pan and allow the cake to cool completely before slicing — at least 30 minutes. Cutting too early may cause the crumb to compress.
- Dust the cooled cake with powdered sugar just before serving. Slice into 8 portions and serve at room temperature with a dollop of whipped cream, a scoop of vanilla ice cream, or a drizzle of warm caramel sauce.
- Store leftover cake in an airtight container at room temperature for up to 3 days. For longer storage, wrap individual slices in plastic wrap and refrigerate for up to 5 days, or freeze for up to 2 months. Thaw overnight at room temperature before serving.
Notes
– Use firm, slightly tart apples like Granny Smith or Honeycrisp for the best texture — they hold their shape during baking and balance the sweetness of the batter.
– Do not overmix the batter once you add the flour; overmixing develops gluten and results in a tough, dense crumb.
– Check the cake at 45 minutes — oven temperatures vary, and overbaking is the most common mistake with apple cakes.
– Room temperature butter and eggs blend more smoothly and create a more uniform batter. INGREDIENT SUBSTITUTIONS
– Butter: replace with an equal amount of neutral vegetable oil for a slightly moister crumb.
– All-purpose flour: use a 1:1 gluten-free flour blend if needed.
– Milk: any plant-based milk (oat, almond, soy) works as a direct substitute. HOW TO SERVE
This cake is delicious at room temperature, slightly warm, or cold from the fridge. Serve plain with coffee or tea, or dress it up with a scoop of vanilla ice cream, whipped cream, or a warm caramel drizzle for a more indulgent dessert. STORAGE & FRESHNESS
Room temperature: up to 3 days in an airtight container.
Refrigerator: up to 5 days, wrapped well to prevent drying out.
Freezer: up to 2 months. Wrap individual slices in plastic wrap then place in a zip-lock bag. Thaw at room temperature for 1–2 hours before serving. MAKE-AHEAD TIPS
You can prepare the batter up to 24 hours in advance and keep it covered in the refrigerator. You can also bake the cake 1 day ahead — it actually tastes better the next day as the flavors meld together.
FAQ
What is the best way to serve stack cake?
Stack cake is best served with whipped cream or vanilla ice cream to complement its flavors.
Can I use fresh apples instead of dried for the filling?
Yes, fresh apples can be used but they should be cooked down to a thick, spiced apple butter consistency.
How long does stack cake last?
When stored properly in an airtight container, stack cake can last up to five days at room temperature.

