
Created on October 22nd, 2026 at 07:30 am
Table of Contents
Introduction: Six-Inch Chocolate Cake
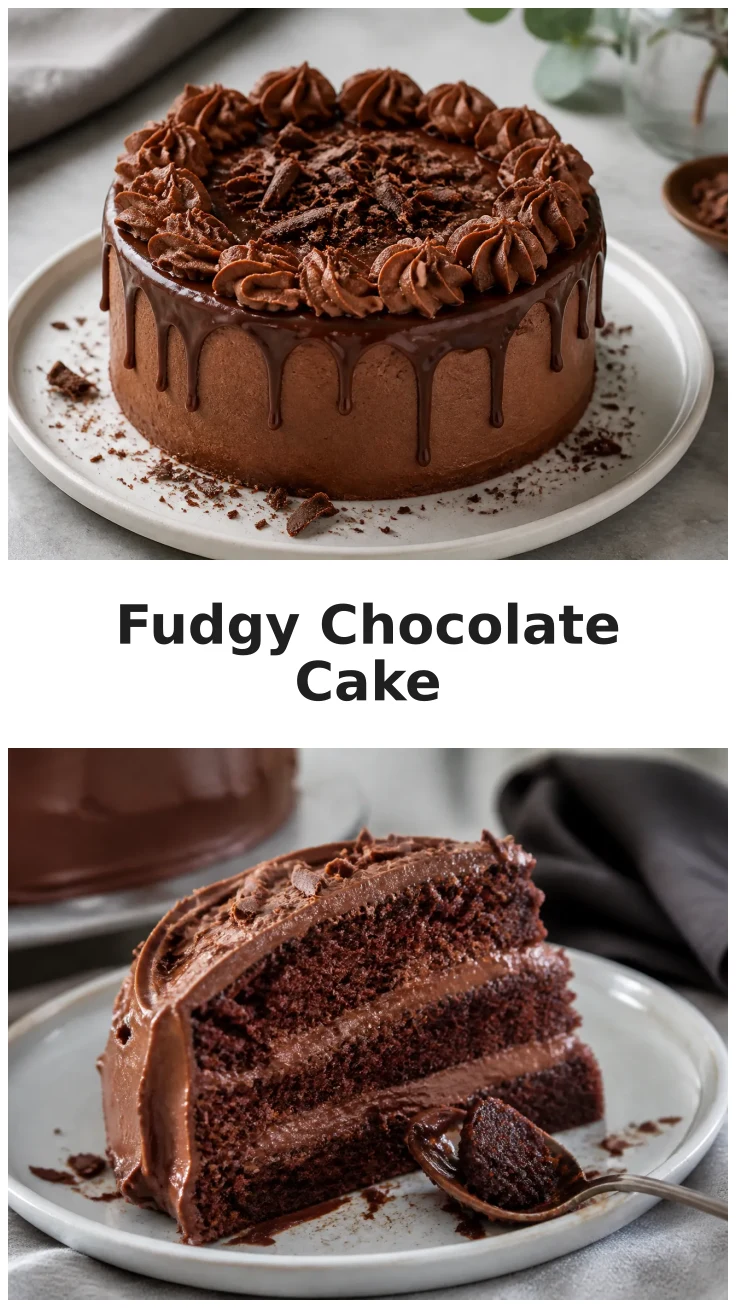
Creating a dessert that is both delicious and perfectly sized for intimate gatherings can be a delightful challenge for any home baker. Enter the six-inch chocolate cake, a mini chocolate cake that packs a punch of flavor in every bite. With its rich, fudgy finish, this small batch cake is an ideal choice for those wanting to celebrate in style without going overboard.
This cake is designed to serve around eight people, making it perfect for small gatherings, birthdays, or any occasion that calls for a sweet treat. Its compact size doesn’t compromise on taste, offering a deep chocolate flavor that satisfies any chocolate lover’s cravings.
Why Choose a Six-Inch Cake?
Opting for a six-inch cake allows you to enjoy the indulgence of a homemade dessert without the commitment of a larger cake. It is an excellent choice for those who want to celebrate without leftovers. This size also ensures that every slice is fresh and moist, providing a delightful experience from the first bite to the last.
Perfect for Small Gatherings
Small gatherings call for a cake that matches the occasion’s intimacy, and a six-inch chocolate cake does just that. Whether it’s a cozy family dinner or a small birthday celebration, this cake fits the bill. Its size makes it easy to serve, and its rich flavor leaves a lasting impression on all who taste it.

Love baking cakes like this one? 🎂
Get our newest cake recipes and seasonal baking ideas in your inbox every week. Free, no spam, unsubscribe anytime. See our Privacy Policy.
Ingredients
Essential Ingredients for a Fudgy Cake
To achieve that perfect fudgy texture, this cake relies on high-quality ingredients. You’ll need cocoa powder, all-purpose flour, baking soda, baking powder, salt, unsalted butter, granulated sugar, eggs, vanilla extract, and buttermilk. Each component plays a crucial role in the cake’s consistency and flavor, ensuring a rich and moist result.
Optional Add-ins for Extra Flavor
While the basic ingredients create a delightful cake, you can enhance it further with add-ins like chocolate chips, nuts, or a hint of espresso powder to deepen the chocolate flavor. These extras can be mixed into the batter or used as toppings to add texture and complexity to each slice.
Step-by-Step Instructions
Preparing Your Baking Tools
Before starting, ensure you have all your baking tools ready. This includes a six-inch round cake pan, an electric mixer, and a large mixing bowl. Grease and flour the cake pan to prevent sticking, and preheat your oven to 350°F to ensure even baking.
Mixing the Batter
Begin by creaming the butter and sugar together until light and fluffy. Add the eggs one at a time, beating well after each addition. Mix in the vanilla extract. In a separate bowl, whisk together the dry ingredients. Gradually add the dry mixture to the wet ingredients, alternating with buttermilk, until just combined. Stir in any optional add-ins at this stage.
Baking and Cooling the Cake
Pour the batter into the prepared pan, smoothing the top with a spatula. Bake in the preheated oven for about 30-35 minutes, or until a toothpick inserted into the center comes out clean. Allow the cake to cool in the pan for 10 minutes before transferring it to a wire rack to cool completely. For a decadent finish, consider topping the cake with a chocolate ganache. For more ideas, see our Chocolate Ganache Birthday Cake.
Pro Tips
Creating the perfect six-inch chocolate cake requires attention to detail and a few insider tips. Here are some to ensure your cake is a success:
- Ensure all ingredients are at room temperature before starting to help them blend smoothly.
- Measure your ingredients accurately, especially the flour, to prevent a dense cake.
- Use high-quality cocoa powder for a richer chocolate flavor.
- Don’t overmix the batter; this can lead to a tough texture.
One of the most crucial tips is to use a toothpick to check the cake’s doneness. A clean toothpick means the cake is ready, while a few moist crumbs indicate a perfectly fudgy interior.
Love baking cakes like this one? 🎂
Get our newest cake recipes and seasonal baking ideas in your inbox every week. Free, no spam, unsubscribe anytime. See our Privacy Policy.
Serving Suggestions
Pairing with Beverages
A rich chocolate cake deserves an equally delightful beverage. Pair it with a hot cup of coffee or a glass of milk to complement the cake’s deep flavors. For adults, a decaffeinated espresso can enhance the chocolate notes beautifully. For more dessert inspiration, explore our Cranberry White Chocolate Oatmeal Cookies.
Occasions to Serve This Cake
This six-inch chocolate cake is versatile enough for various occasions, from birthday celebrations to casual family dinners. Its size and flavor make it a crowd-pleaser, perfect for those who appreciate the finer things in life. For grander events, consider our Triple Chocolate Birthday Cake.
Nutritional Information
Calorie Count and Nutrients
While indulgent, this cake offers a manageable calorie count, making it a guilt-free pleasure when enjoyed in moderation. Each slice contains approximately 320 calories, with a balanced mix of carbohydrates, fats, and proteins to satisfy your sweet tooth without overindulgence.


Six-Inch Chocolate Cake

Equipment
- 1 6-inch round cake pan greased and floured
- 1 electric mixer
- 1 Mixing Bowl large
Ingredients
Dry Ingredients
- 1 cup all-purpose flour
- 1/2 cup cocoa powder
- 1 tsp baking soda
- 1/4 tsp salt
Wet Ingredients
- 1/2 cup unsalted butter softened
- 1 cup granulated sugar
- 2 large eggs room temperature
- 1 tsp vanilla extract
- 1/2 cup buttermilk
Instructions
Preparation
- Preheat your oven to 350°F. Grease and flour a 6-inch round cake pan to prevent the cake from sticking.
- In a mixing bowl, sift together the flour, cocoa powder, baking soda, and salt. Set aside.
- In a large bowl, cream the softened butter and granulated sugar using an electric mixer until light and fluffy.
- Beat in the eggs one at a time, ensuring each is fully incorporated before adding the next. Stir in the vanilla extract.
- Gradually add the dry ingredients to the creamed mixture, alternating with the buttermilk. Mix until just combined.
- Pour the batter into the prepared pan. Smooth the top and bake for 30-35 minutes until a toothpick inserted into the center comes out clean.
- Remove the cake from the oven and let it cool in the pan for 10 minutes. Transfer to a wire rack to cool completely.
Serving
- Once cooled, frost with your choice of icing or serve plain. Slice into 8 pieces and enjoy.
Storage
- Store any leftover cake in an airtight container at room temperature for up to 3 days.
Notes
Ingredient Substitutions: You can replace buttermilk with milk mixed with 1/2 tsp of vinegar.
How to Serve: Perfect with a scoop of vanilla ice cream or a dollop of whipped cream.
Storage & Freshness: Store in an airtight container at room temperature for up to 3 days.
Make-Ahead Tips: Bake the cake a day in advance and store it covered until ready to frost and serve.
FAQ
Can I make this cake in advance?
Yes, you can prepare the cake a day ahead of time. Once baked, let it cool completely before wrapping it in plastic wrap or storing it in an airtight container. This will keep it fresh until you are ready to frost and serve it. Baking ahead can also enhance the flavors, making it even more delicious when served.
What can I use instead of buttermilk?
If you don’t have buttermilk on hand, you can easily make a substitute by mixing 1/2 cup of milk with 1/2 teaspoon of vinegar or lemon juice. Let it sit for a few minutes until it thickens slightly. This will mimic the acidity and texture of buttermilk, ensuring your cake comes out just as moist and tender.
How do I know when the cake is done?
To check if the cake is done, insert a toothpick into the center of the cake. If it comes out clean or with a few moist crumbs, the cake is ready. If the toothpick has wet batter on it, continue baking the cake for a few more minutes and test again. This method helps ensure that your cake is perfectly baked without being overdone.
Enjoyed this recipe? Leave a review!
There are no reviews yet. Be the first one to write one.

