Created on June 4th, 2025 at 06:05 pm
Table of Contents
Bringing the elegance of Middle Eastern desserts into your own kitchen has never been easier. In this article, you’ll discover a beautifully layered homemade Kunafa cake that turns everyday ingredients into something truly special. This unique twist on a traditional kunafa blends crispy kataifi pastry with creamy filling and tender cake—perfect for impressing guests or creating meaningful family moments. Whether you’re a seasoned baker or just starting out, this guide makes it simple, fun, and delicious

The Story & Intro – Why This Homemade Kunafa Cake Matters
How Kunafa Cake Became a Family Tradition
The very first time I tasted kunafa, I was wandering through a fragrant market with my family during a summer visit to Jordan. Golden, crisp strands of pastry were layered with cream and soaked in orange blossom syrup—it was magic. I couldn’t stop thinking about it. So back home, I began tinkering in my kitchen, determined to recreate that experience in a way that felt familiar, like the cakes I love to bake. That’s how this homemade Kunafa cake was born: a blend of tradition and comfort, made easy for modern family kitchens.
I wanted a dessert that could be made in under an hour, using store-bought kataifi dough and simple ingredients. One that didn’t require special skills, but still wowed at celebrations. The result is a cake that brings people together—something that lights up your kitchen and turns an ordinary evening into something meaningful.
This version stays true to the spirit of classic kunafa, with crisp edges, silky filling, and syrup that seeps into every crumb. But it’s also playful, with a soft cake layer in the center, making it perfect for birthdays, Eid, or just a cozy weekend. Whether you’re introducing your kids to a piece of your heritage or just trying something new, this cake invites everyone to the table.
Why You’ll Love This Homemade Kunafa Cake
It’s not just delicious—it’s doable. The kataifi bakes up golden and crisp without fuss. The creamy filling comes together in minutes. And the cake layer? Just one bowl. It’s the kind of dessert that feels luxurious but fits into real life, which is what we’re all about here at StarsCake. With a syrup that gently perfumes each bite and a texture contrast that keeps guests asking for seconds, this cake is joy in a pan.
Looking for more globally inspired ideas? Our basbousa recipe and caramel tres leches cake are also family favorites that travel beautifully across cultures. For more everyday cake magic, visit our cake category for recipes designed with busy bakers in mind.
Essential Ingredients & Prep Tips for Homemade Kunafa Cake
What You Need for a Beautiful Kunafa Cake
Making a homemade Kunafa cake doesn’t mean tracking down hard-to-find ingredients. In fact, everything you need can be found in most well-stocked grocery stores. The base of this cake is kataifi dough, which is finely shredded phyllo pastry. You’ll often find it in the freezer section near other Mediterranean items. Once baked, it becomes perfectly crisp and golden—ideal for that signature kunafa crunch.
The creamy filling in our version is a mix of ricotta and mascarpone, giving you a rich but slightly tangy center that’s light and indulgent all at once. If mascarpone isn’t available, cream cheese is a reliable substitute that blends beautifully. The syrup, delicately scented with orange blossom water, ties everything together with a floral note that’s never overpowering.

Here’s what you’ll need:
- 300g (10 oz) kataifi dough, thawed and fluffed apart
- ½ cup (120g) unsalted butter, melted
- 1 cup (250g) ricotta cheese
- ½ cup (120g) mascarpone or cream cheese, softened
- ⅓ cup (75g) granulated sugar (for the filling)
- 1 teaspoon vanilla extract
- 1 cup (120g) all-purpose flour
- 2 large eggs, at room temperature
- 1 teaspoon baking powder
- ½ cup whole milk
- 1 tablespoon orange blossom water
- 1 teaspoon lemon juice
- ¾ cup (150g) sugar (for the syrup)
- ½ cup water (for the syrup)
If you’re short on time or ingredients, check out our easy baklava cake that swaps in walnuts and honey for a spiced twist. It’s another reader favorite that starts with kataifi dough!
Kitchen Secrets for Kataifi Perfection
Start by gently pulling the kataifi apart with your fingers until it’s fluffy and loose. This step is key—it allows the butter to coat every strand evenly so it bakes up beautifully crisp. Use clean hands to toss the shredded pastry with the melted butter in a large bowl. You want every thread buttery but not soggy.
When baking the cake layer, don’t overmix. This helps it stay light and fluffy under the creamy center. Let the baked kataifi cool slightly before assembling; this prevents melting the filling and keeps the texture sharp.
And here’s a favorite trick: after assembling the full cake, return it to the oven for 5–8 minutes to lightly set the filling and meld the textures. It’s a small step with a big payoff.
Baking & Assembling the Perfect Homemade Kunafa Cake

Step-by-Step Baking That’s Actually Fun
This recipe was made for busy families who want something special without the stress. You don’t need professional tools or advanced skills—just a round springform pan, a hand mixer (or whisk!), and a few bowls. Let’s break it down into manageable steps that even first-time bakers will find joyful.
Step 1: Prepare the Syrup
Start by combining ¾ cup sugar and ½ cup water in a saucepan. Bring it to a simmer over medium heat. Once the sugar dissolves, let it bubble gently for 5 minutes, then stir in 1 tablespoon of orange blossom water and 1 teaspoon lemon juice. Remove from heat and let it cool completely. This gives you time to work on the cake without rushing.
Step 2: Toast the Kataifi Layer
Preheat your oven to 350°F (175°C). While it heats, fluff your kataifi dough (about 300g) and toss it with ½ cup of melted butter. Press two-thirds of it gently into the bottom of a greased 9-inch springform pan to form a base layer. Bake for 15–18 minutes until lightly golden. Let it cool while you prepare the rest.
Step 3: Mix the Creamy Filling
In a bowl, mix 1 cup ricotta, ½ cup mascarpone (or cream cheese), ⅓ cup sugar, and 1 tsp vanilla. Blend until smooth. This mixture adds a luscious, slightly tangy layer that balances the sweetness beautifully.
Step 4: Whisk the Cake Batter
In another bowl, whisk 2 eggs and ½ cup sugar until pale and thick. Add ½ cup milk, 1 cup flour, and 1 tsp baking powder. Stir just until smooth. This forms the soft sponge layer that makes the cake unique.
Step 5: Assemble the Cake
Pour the cake batter gently over the baked kataifi base. Spoon the cheese filling on top, smoothing it evenly. Finally, sprinkle the remaining kataifi over the top and lightly press it down. Bake for 30–35 minutes until the top is golden and a toothpick inserted in the cake comes out clean.
Step 6: Syrup Soak
As soon as the cake comes out of the oven, pour the cooled syrup slowly over the top. Let it soak in for 10–15 minutes before removing the springform ring. This step brings everything together and adds that classic kunafa shimmer.
If you’re a fan of layered cakes, you’ll love our strawberry milk cake, which also balances sponge and cream beautifully. You can also visit our Cake list for more global inspiration that fits everyday baking.
How to Serve and Store Homemade Kunafa Cake

Serving Ideas That Make It Feel Special
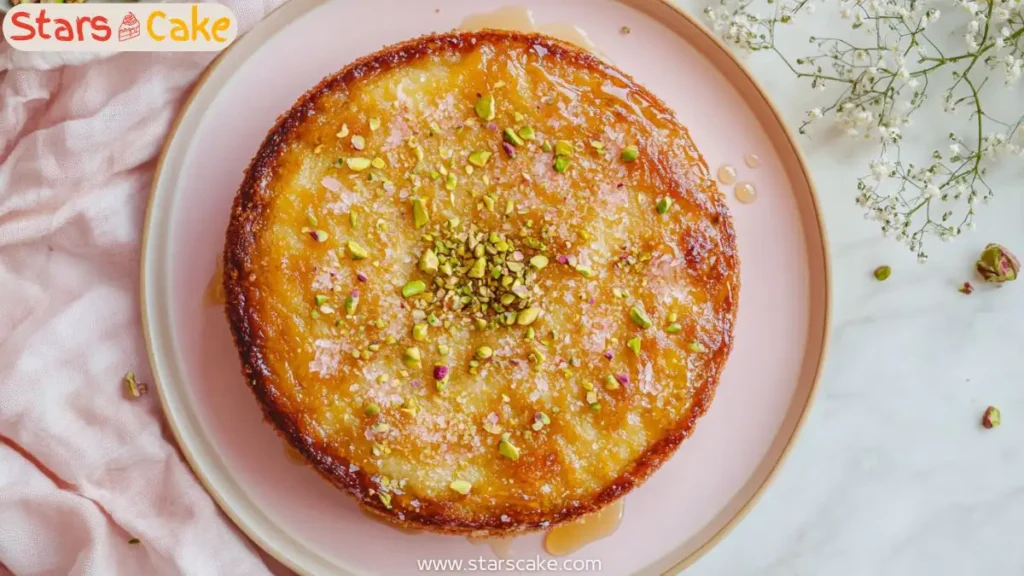
This homemade Kunafa cake is already stunning with its golden crust and creamy layers, but there are a few simple ways to take it from weekday treat to celebration centerpiece. Just before serving, sprinkle the top with chopped pistachios—they add crunch and a pretty green contrast. If you’re feeling extra festive, add a light dusting of powdered sugar or drizzle with an extra spoonful of orange blossom syrup.
For a fresh twist, serve each slice with a dollop of whipped cream or a scoop of vanilla ice cream. If you’re planning this for a holiday table or birthday dinner, a few edible rose petals add a lovely, floral touch without any extra prep. The key is to keep it simple and beautiful—just like all our bakes here at StarsCake.
Planning a dessert table? This recipe pairs beautifully with our cream cheese date bars or pistachio rose cupcakes, especially if you’re hosting a gathering with Middle Eastern flair.
Make-Ahead and Leftover Tips
Kunafa cake is wonderful freshly made but also holds up surprisingly well. After baking and soaking with syrup, let it cool completely. Then store it in the fridge, covered, for up to 3 days. The crust will soften slightly, but the flavor becomes even richer.
To reheat, simply place slices in the oven at 300°F (150°C) for 8–10 minutes to restore the crispy edges. Avoid microwaving—it softens the kataifi too much.
Want to make it ahead? You can fully assemble the cake up to a day before baking and keep it chilled (unbaked and unsyruped). On the day of serving, bake it fresh and pour over the syrup just before slicing.
We have a full guide on make-ahead cakes that’s packed with tips if you’re planning a party and want to bake in advance.
A Cake That Connects Generations
Homemade Kunafa cake is more than just a dessert—it’s a bridge between cultures, a celebration of family, and a moment of calm in a busy week. With every buttery crunch and creamy bite, you’re creating memories that linger longer than any slice. Whether you’re reconnecting with your roots or exploring something new, this cake welcomes everyone to the table.
Emma’s mission is always to make baking feel approachable, even joyful. And this recipe is just that—doable, delicious, and deeply comforting. If this cake brought a smile to your kitchen, don’t miss our easy coconut semolina basbousa or browse all our family baking favorites.
FAQ
What is Kunafa cake made of?
Kunafa cake is made from shredded kataifi dough, creamy cheese filling (like ricotta or cream cheese), and a simple vanilla cake batter. It’s finished with a fragrant sugar syrup, often flavored with orange blossom or rose water. The result is a layered dessert with crispy, creamy, and soft textures in every bite.
Can I use shredded phyllo dough instead of kataifi?
Kataifi is a type of shredded phyllo, but if you can’t find it, finely chopping sheets of phyllo dough is a doable substitute. It won’t give quite the same crisp texture, but with a generous butter coating and careful layering, it still bakes up beautifully.
How long does Kunafa cake stay fresh?
Kunafa cake stays fresh for up to 3 days in the fridge when covered. To enjoy the crisp texture again, reheat slices in the oven at 300°F for 8–10 minutes. It’s best served warm with a little extra syrup drizzled over the top.
Can I make Kunafa cake ahead of time?
Yes! You can fully assemble the cake (before baking) a day in advance and keep it chilled. On the day you plan to serve it, bake it fresh and pour the cooled syrup on top. It’s a fantastic make-ahead dessert for holidays or family gatherings.

