Created on October 13th, 2026 at 03:30 am
Table of Contents
Introduction: Microwave Mug Brownie
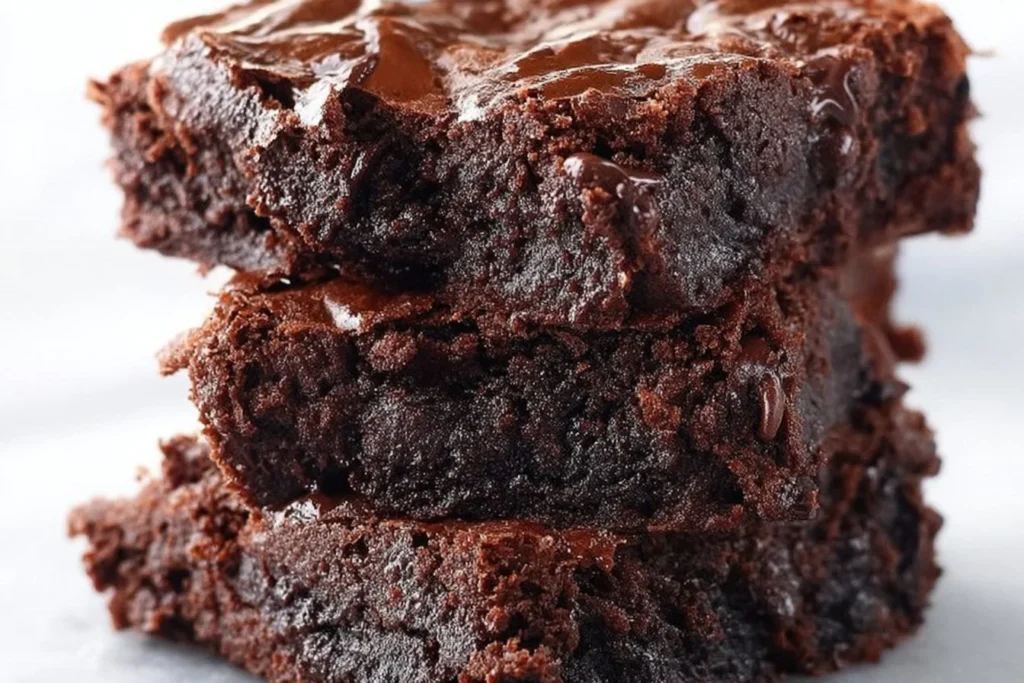
Welcome to the delightful world of microwave mug brownies, where a warm, fudgy dessert is just a minute away. Ideal for satisfying those sudden chocolate cravings, this single-serve brownie is the epitome of convenience and deliciousness. Whether you’re short on time or simply desire a personal treat without the fuss of baking an entire batch, this microwave mug brownie has got you covered.
In the hustle and bustle of daily life, finding time to indulge in a quick chocolate dessert can be a challenge. But with this easy microwave dessert, you can enjoy a rich and gooey chocolate mug cake in no time. Let’s dive deeper into why microwave mug brownies are the perfect solution for your dessert needs. For more inspiration, check out Easy Mug Brownie Recipe.
Why Microwave Mug Brownies are Perfect for Quick Desserts
Microwave mug brownies are not only a time-saver but also a game-changer in the world of desserts. These brownies are designed for those moments when you need dessert instantly. There’s no need for preheating ovens or washing multiple dishes. With just a few ingredients mixed in a mug and a minute or two in the microwave, you get a perfectly portioned single serve brownie with a warm center that’s sure to satisfy your sweet tooth.
This dessert is especially appealing because it allows for experimentation and personalization. You can easily adjust the ingredients to suit your taste, add toppings or mix-ins, and create a dessert that feels gourmet in a fraction of the time it takes to bake a traditional brownie.
The Appeal of Single Serve Desserts
Single serve desserts have become increasingly popular due to their convenience and portion control. They offer a way to enjoy a sweet treat without the commitment of leftovers. For those who live alone or want to avoid the temptation of overindulging, single serve desserts like this microwave mug brownie are ideal.
Moreover, single serve desserts are incredibly versatile. You can easily make adjustments based on dietary preferences or available ingredients. Whether you’re looking for a quick fix after dinner or a mid-day pick-me-up, this mug cake recipe is your go-to solution for easy microwave desserts.

Love baking cakes like this one? 🎂
Get our newest cake recipes and seasonal baking ideas in your inbox every week. Free, no spam, unsubscribe anytime. See our Privacy Policy.
Ingredients
Creating your own microwave mug brownie requires just a handful of pantry staples. These essential ingredients come together to form a decadent treat that’s both simple and satisfying. Let’s take a look at what you need to create this quick chocolate dessert.
Essential Ingredients for a Perfect Mug Brownie
The beauty of this recipe lies in its simplicity. You can whip up this dessert using common ingredients you likely already have in your kitchen. Here’s what you’ll need:
- All-purpose flour
- Granulated sugar
- Unsweetened cocoa powder
- Salt
- Baking powder
- Milk
- Vegetable oil
- Vanilla extract
Optional Add-ins for Extra Flavor
While the basic recipe is delicious on its own, you can elevate your mug brownie with a variety of add-ins. Consider these options to customize your dessert:
- Chocolate chips or chunks
- Chopped nuts like walnuts or pecans
- A dollop of peanut butter or Nutella
- Mini marshmallows
- A sprinkle of sea salt for a sweet and salty contrast

Step-by-Step Instructions
Now that you have your ingredients ready, it’s time to prepare your microwave mug brownie. Follow these step-by-step instructions to achieve the perfect quick chocolate dessert.
Mixing the Ingredients
Start by selecting a microwave-safe mug or ramekin that holds at least 12 ounces. Add the dry ingredients first: flour, sugar, cocoa powder, salt, and baking powder. Stir them together with a fork or small whisk until they are evenly combined. This ensures that your mug brownie has a uniform texture.
Next, add the wet ingredients: milk, vegetable oil, and vanilla extract. Mix everything together until you achieve a smooth batter. If you’re adding any extras like chocolate chips or nuts, gently fold them into the batter now.
Microwaving to Perfection
Place your mug in the center of the microwave and cook on high for 60 to 90 seconds. The exact time will depend on your microwave’s wattage, so start with 60 seconds and check for doneness. The brownie should be set on top but still slightly gooey in the center.
Avoid overcooking, as this can lead to a dry texture. It’s better to undercook slightly since the brownie will continue to cook from residual heat once removed from the microwave.
Checking for Doneness
To check if your brownie is done, gently touch the center with a spoon or your finger. It should be soft but not wet. If the center appears too runny, microwave for an additional 10-15 seconds, checking frequently to avoid overcooking.
Remember, the goal is to have a warm fudgy center that oozes slightly when you dig into it. Once you’re satisfied with the texture, let it cool for a minute or two before serving.
Pro Tips
Creating the perfect microwave mug brownie is a breeze with these pro tips. Ensure your dessert turns out perfectly every time by following these guidelines.
- Measure Accurately: Use a spoon to scoop the flour into your measuring cup, then level it off with a knife for the best results.
- Mix Thoroughly: Make sure all dry bits are incorporated into the batter to avoid any flour pockets in your brownie.
- Experiment with Flavors: Add a pinch of instant coffee granules to intensify the chocolate flavor.
- Monitor Cooking Time: Microwaves vary, so adjust the cooking time as needed to achieve your desired texture.
One of the most important aspects of making a microwave mug brownie is achieving the ideal fudgy center. To do this, keep a close eye on your brownie during the last few seconds of cooking and remember that it will continue to cook slightly once out of the microwave.
Love baking cakes like this one? 🎂
Get our newest cake recipes and seasonal baking ideas in your inbox every week. Free, no spam, unsubscribe anytime. See our Privacy Policy.
Serving Suggestions
Once your microwave mug brownie is ready, it’s time to enjoy it! Here are some serving suggestions to enhance your mug cake experience.
Pairing with Ice Cream or Whipped Cream
For an extra indulgent treat, top your brownie with a scoop of vanilla ice cream or a generous dollop of whipped cream. The contrast between the warm brownie and the cold ice cream creates a delightful combination that’s hard to resist.
If you prefer a lighter option, a spoonful of Greek yogurt also pairs nicely with this dessert, adding a tangy contrast to the rich chocolate.
Garnishing Ideas for Presentation
Elevate the presentation of your mug brownie with a few simple garnishes. Dust the top with powdered sugar or cocoa powder for a classic look. You might also consider adding fresh berries, a drizzle of chocolate syrup, or a sprinkle of chopped nuts for added texture and flavor.
For more inspiration on how to serve your mug brownie, check out these Chocolate Brownie Truffles for creative ideas.
Nutritional Information
Understanding the nutritional content of your dessert can help you make informed choices. Here’s a breakdown of the calories and macronutrients in a typical microwave mug brownie.
Caloric Content and Nutritional Breakdown
Each serving of this microwave mug brownie contains approximately 320 calories, with 48 grams of carbohydrates, 5 grams of protein, and 13 grams of fat. The dessert also provides 2 grams of fiber and 28 grams of sugar, making it a sweet treat best enjoyed in moderation.
Tips for a Healthier Version
To lighten up your mug brownie, consider these modifications: use unsweetened almond milk in place of regular milk, substitute half of the sugar with a natural sweetener like stevia, and replace some of the oil with unsweetened applesauce. These changes can reduce the calorie content while maintaining a delicious taste.


Microwave Mug Brownie

Equipment
- 1 microwave-safe mug 12-ounce capacity
- 1 fork or whisk
Ingredients
Dry Ingredients
- 1/4 cup all-purpose flour
- 1/4 cup granulated sugar
- 2 tbsp unsweetened cocoa powder
- 1/8 tsp salt
- 1/8 tsp baking powder
Wet Ingredients
- 3 tbsp milk
- 2 tbsp vegetable oil
- 1/4 tsp vanilla extract
Instructions
Preparation
- In a microwave-safe mug, combine the flour, sugar, cocoa powder, salt, and baking powder. Stir with a fork or small whisk to blend.
- Pour in the milk, vegetable oil, and vanilla extract. Mix until you have a smooth batter.
Serving
- Microwave on high for 60-90 seconds. Let it cool for a minute before serving. Top with ice cream or whipped cream if desired.
Storage
- This dessert is best enjoyed fresh and warm. Avoid storing, as it may dry out.
Notes
Ingredient Substitutions: You can use almond milk instead of regular milk, and coconut oil in place of vegetable oil for a different flavor profile.
How to Serve: Top with a scoop of vanilla ice cream or a dollop of whipped cream for an extra indulgent treat.
Storage & Freshness: This brownie is best enjoyed immediately after microwaving. If needed, reheat for a few seconds to restore warmth.
Make-Ahead Tips: Pre-measure your dry ingredients in a small baggie for quick assembly whenever the craving strikes.
FAQ
Can I make this mug brownie dairy-free?
Yes, you can easily adapt this recipe to be dairy-free. Substitute the milk with a dairy-free alternative such as almond milk, soy milk, or oat milk. These options will maintain the moist texture of the brownie while accommodating a dairy-free diet. Additionally, ensure that any chocolate chips or other add-ins are also dairy-free if you’re including them in the batter.
How do I prevent my mug brownie from becoming dry?
To avoid a dry mug brownie, be cautious not to overcook it. Start with 60 seconds of microwaving and check for doneness, adding more time in 10-second increments as needed. Microwaves vary in power, so it’s essential to monitor the cooking process closely. Remember, the brownie will continue to cook slightly even after it’s removed from the microwave, so it’s better to err on the side of undercooking if you’re unsure.
Enjoyed this recipe? Leave a review!
There are no reviews yet. Be the first one to write one.