Created on May 1st, 2026 at 10:22 am
Table of Contents
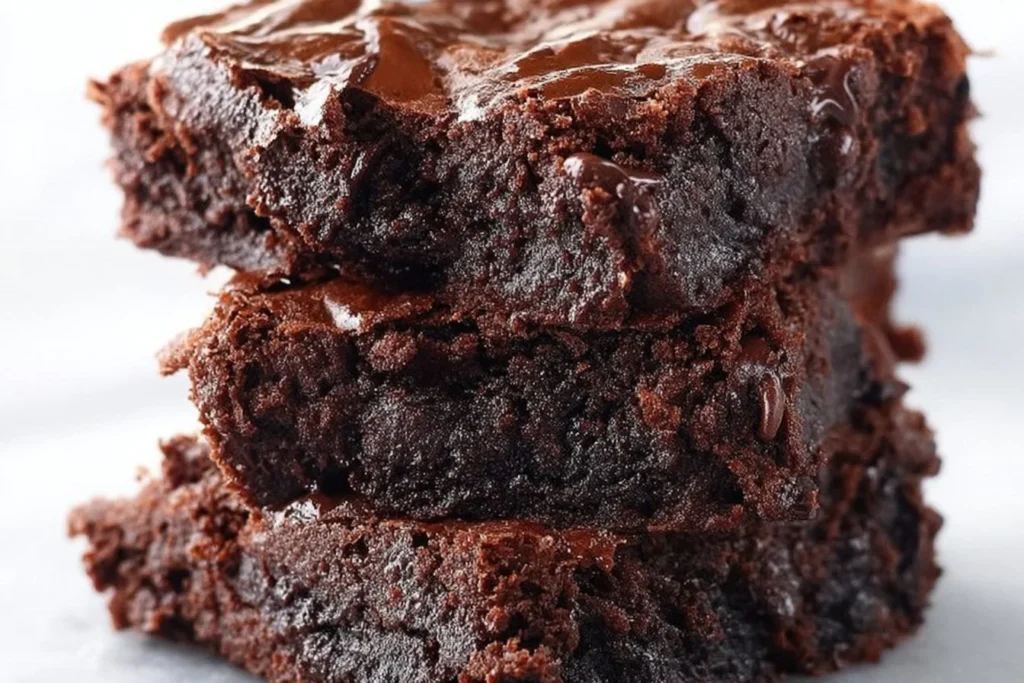
Introduction to Chocolate Thunder Outback
The Origin of Chocolate Thunder
The Chocolate Thunder From Down Under is a beloved dessert originating from Outback Steakhouse, known for its rich and decadent flavor profile. This dessert is a delightful combination of a warm chocolate brownie topped with vanilla ice cream, drizzled with chocolate sauce, and finished with whipped cream. It’s the epitome of chocolate indulgence and has become a staple for chocolate lovers seeking a luxurious treat.
Why You’ll Love This Recipe
This recipe for Chocolate Thunder Outback Brownies brings the restaurant experience to your home kitchen. You will love the simplicity of creating a restaurant-quality dessert without complicated steps. These brownies are not only easy to make but also incredibly satisfying for any chocolate craving. Whether you’re hosting a dinner party or simply indulging in a treat for yourself, these brownies will make every occasion special.

Ingredients Needed for Chocolate Thunder Outback
Essential Ingredients
To create these delicious brownies, you’ll need some staple ingredients. The combination of chocolate and vanilla is classic, making the dessert rich and flavorful. The essential ingredients include all-purpose flour, unsweetened cocoa powder, sugar, butter, eggs, and vanilla extract. These components form the foundation of the brownie, delivering a moist and fudgy texture.
Optional Add-ins for Extra Flavor
For those who want to elevate their brownies, consider adding chocolate chips, nuts, or a touch of espresso powder to the batter. These add-ins can enhance the flavor profile, adding complexity and depth. Chocolate chips provide bursts of melted chocolate throughout the brownie, while nuts such as pecans or walnuts offer a delightful crunch.
Using Cake Mix for Convenience
If you’re short on time, using a boxed cake mix can be a lifesaver. It simplifies the process while still delivering a delightful dessert. Choose a high-quality chocolate cake mix and enhance it with additional cocoa powder and chocolate chips for that homemade touch. This method ensures you’ll have a delicious dessert with minimal effort.
Step-by-Step Preparation
Preparing the Batter
Start by preheating your oven to 350°F. In a large mixing bowl, cream the butter and sugar together until light and fluffy. Add the eggs one at a time, ensuring each is fully incorporated before adding the next. Stir in the vanilla extract. In a separate bowl, sift together the flour, cocoa powder, and baking powder. Gradually add the dry ingredients to the wet mixture, mixing until just combined.
Baking to Perfection
Pour the batter into a greased and floured 9-inch round cake pan. Bake in the preheated oven for about 35-40 minutes, or until a toothpick inserted into the center comes out with moist crumbs. Be careful not to overbake, as this will result in a dry brownie. The center should be slightly soft to ensure a fudgy texture once cooled.
Cooling and Serving
Allow the brownies to cool in the pan for about 10 minutes before transferring to a wire rack to cool completely. Serve warm with a scoop of vanilla ice cream on top, drizzled with chocolate sauce, and garnished with whipped cream. This combination of warm brownie and cold ice cream creates a delightful contrast that enhances the overall experience.

Pro Tips
For the best results, consider these pro tips to elevate your baking experience and ensure perfect brownies every time.
- Use high-quality cocoa powder for a richer chocolate flavor.
- Ensure all ingredients are at room temperature before starting.
- Do not overmix the batter to maintain a tender crumb.
- Adjust baking time based on your oven, as temperatures can vary.
The most important tip is to avoid overbaking. Keeping an eye on the brownies towards the end of the baking time is crucial to achieving the desired fudgy consistency. Remember, the brownies will continue to cook slightly after being removed from the oven due to residual heat.
Serving Suggestions and Pairings
Perfect Pairings for Chocolate Thunder
Pair these decadent brownies with a scoop of creamy vanilla ice cream for a classic approach, or try serving with a dollop of freshly whipped cream for a lighter option. For a more gourmet touch, consider pairing with a glass of port wine or a rich espresso, which complements the chocolate notes beautifully.
Creative Presentation Ideas
For a stunning presentation, consider dusting the top of the brownies with powdered sugar or cocoa powder. You can also drizzle with white chocolate for a contrasting color and flavor. Serving on a decorative dessert platter with fresh berries adds a pop of color and freshness that contrasts with the rich chocolate.


Chocolate Thunder Outback Brownies
Equipment
- 1 9-inch round cake pan greased and floured
- 1 electric mixer
- 1 Mixing Bowl large
Ingredients
Dry Ingredients
- 2 cups all-purpose flour
- 1 cup unsweetened cocoa powder
- 1 tsp baking powder
- 1/2 tsp salt
Wet Ingredients
- 1 cup unsalted butter softened
- 2 cups granulated sugar
- 4 large eggs room temperature
- 2 tsp vanilla extract
Optional Add-ins
- 1 cup semi-sweet chocolate chips
- 1/2 cup chopped pecans
Instructions
Preparation
- Preheat your oven to 350°F. Grease and flour a 9-inch round cake pan to prevent sticking.
- In a medium bowl, sift together the flour, cocoa powder, baking powder, and salt. Set aside.
- In a large mixing bowl, use an electric mixer to cream the butter and sugar until light and fluffy, about 3-5 minutes.
- Add the eggs one at a time, beating well after each addition. Stir in the vanilla extract until well combined.
- Gradually add the dry ingredients to the wet mixture, mixing on low speed until just combined. Do not overmix.
- Fold in the chocolate chips and chopped pecans, if using, until evenly distributed.
- Pour the batter into the prepared pan and smooth the top with a spatula. Bake in the preheated oven for 35-40 minutes.
- Insert a toothpick into the center of the brownies; it should come out with a few moist crumbs.
Serving
- Allow the brownies to cool in the pan for 10 minutes before transferring to a wire rack. Serve warm with vanilla ice cream and chocolate sauce.
Storage
- Store any leftover brownies in an airtight container at room temperature for up to 3 days or in the refrigerator for up to a week.
Notes
FAQ
Can I use a different type of chocolate?
Yes, you can use different types of chocolate depending on your preference. Dark chocolate chips can be substituted for semi-sweet to enhance the richness of the brownies. If you prefer a sweeter brownie, milk chocolate chips are a great alternative. Remember to adjust the sugar content slightly if using sweeter chocolate to maintain balance.
What is the best way to store these brownies?
To store the brownies, place them in an airtight container at room temperature for up to three days. For longer storage, refrigerate them, where they will stay fresh for up to a week. If you want to keep them for an extended period, consider freezing them. Wrap them individually in plastic wrap, then place them in a freezer-safe bag for up to three months.